Quantcast
Channel: Nasi Lemak Lover
Viewing all 566 articles
Browse latest View live

How to season and caring a Cast Iron Wok 怎样開生鐵鍋和養鍋

$
0
0
When Anne left a comment in my recent Otak-otak Kuey Teow Mee post that she love my wok that didn't sticking when stir fried this noodles. Then remind me that I have yet to post how to season a Cast Iron Wok. I have used this iron wok few months already and love to use it especially for stir fry.


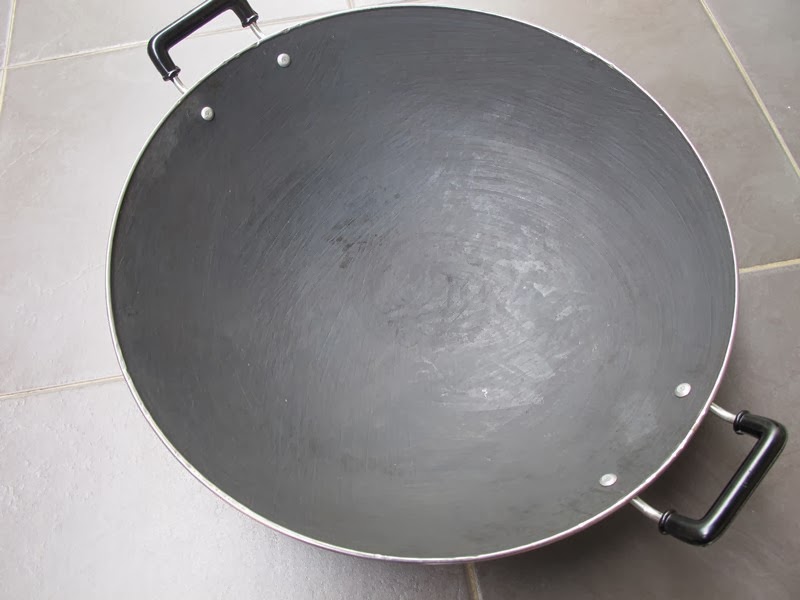
This is the back of the wok which is enamel coated

 
I followed the way which taught by the shop owner.
First wash and scrub with this type of vegetable fibre brush.


Then fill the wok with water and boil it for a while.


You can season the wok the usual way of using pork fat. But I was taught to use this method, using a bunch of Chinese chives. Add in cooking oil, cook and stir the Chinese chives over the whole wok.


\Once the chives has cooked, wash the wok with just water (no soap or cleaning solution) and scrub with vegetable fibre brush. 

 
Then dry the empty wok over low heat (rub water with towel at the upper ring which heat can't reach) .
And now this wok is ready to use !!
So every time once you have finished cooking, immediately wash it with brush (only water but no soap), then dry the wok immediately to avoid rust !


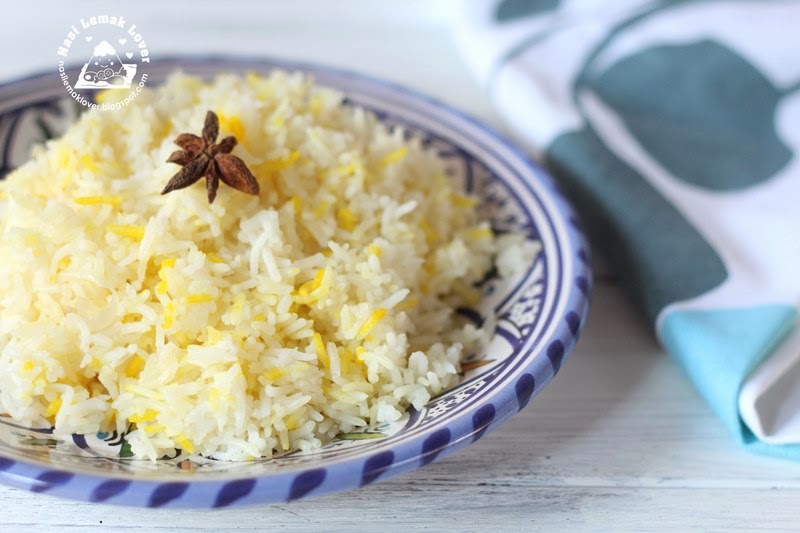
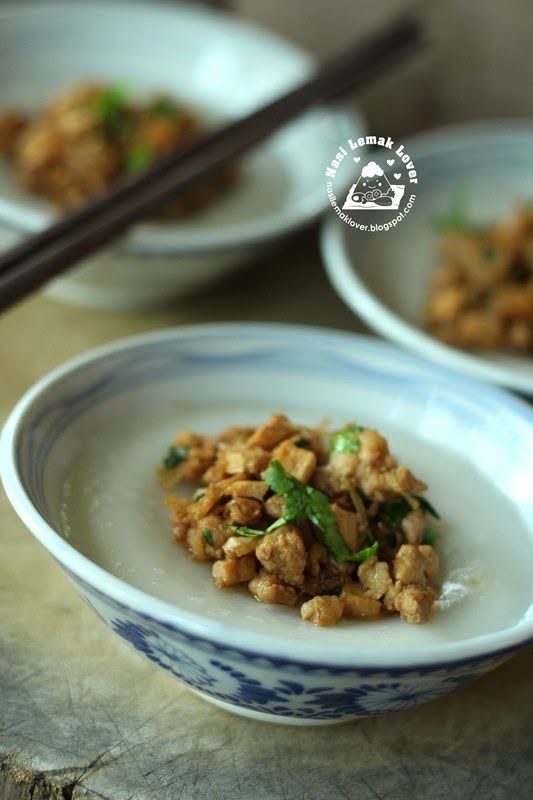
Here is an example of the non-stick result after fried rice


The wok was not sticking at all.

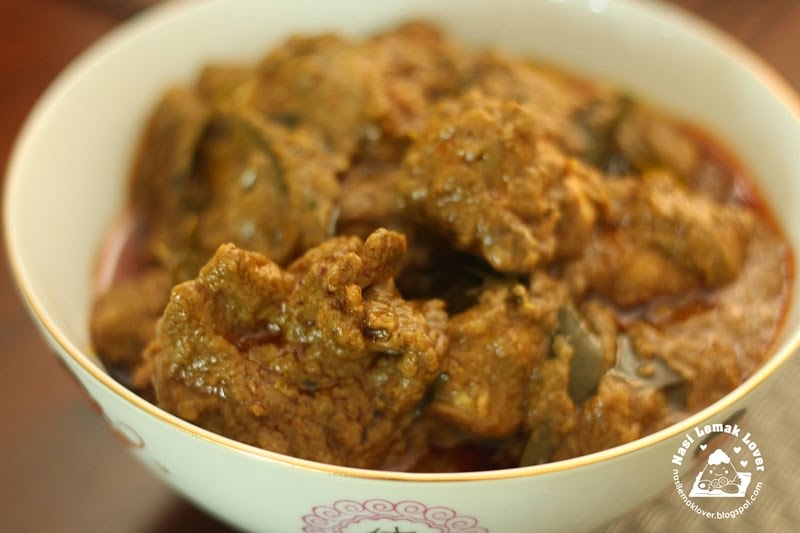
Now I understand why those Tai Chow stalls ( hawker stalls) 's food has wok hei (smoky taste), one of the reason is their cast iron wok using for long period, the wok surface accumulate a layer of oil. When heat it up and it created smoke. So sometime when I stir fry vegetables using this wok, we can taste smoky taste too ^_^ . Anyway, you have to take extra steps to take care this wok, make sure wash it with water (no soap) immediately after cooked, then dry the wok before storing. My advise not to use this wok to cook strong taste foods example like curry (the taste will retain on the oil surface) or long hours braising foods. Instead this wok is perfect for stir fry or deep fry.

Reference:  refer to here


Nasi Minyak (Savoury Rice with saffron) 番红花油饭

$
0
0
I like to cook this savoury rice (Malay called this as Nasi Minyak) whenever I cook Ayam Masak Merah or Curry, because they are the best combo! Few bloggers came to my house during CNY, I cooked this rice to go with chicken curry that they brought.


Saffron 番红花

 
Add hot water to the saffron, then tint rice with this saffron water. So you can have nice yellow colour on the rice. 

 
The usual nasi minyak is cooked with ghee, evaporated milk and a lot of spices, but my version only use a bit of butter and use less spices, because my family couldn't accept too strong taste of spices and too buttery taste of rice. Also all ingredients are easy to find in my pantry.


Nasi Minyak (Savoury Rice with saffron) 番红花油饭

3 cups Basmati rice
5 and 1/2cup water

1 cinnamon stick
5 cardamoms
20g butter (salted)
3 shallots, sliced
2 garlics, sliced
4 pandan leaves ( screwpine leaves), knotted , optional
3/4tsp salt

A pinch of Saffron, soak in 1tbsp hot water for 10mins

Method
1. Wash and drain rice, add in water.
2. Heat up a non-stick frying pan, add in butter, shallots and garlics and sauté till aroma.
3. Add in cinnamon stick and cardamom and mix well. Remove from heat then pour the mixture into rice, add in salt and stir well.
4. Add in knotted pandan leaves, and cook the rice.
5. Once rice cooker switch to “warm” mode, sprinkle saffron water on few spots.
6. Once rice is cooked, fluff rice with chopsticks (you can see some rice tinted with yellow ).
7. You may serve with Ayam masak merak, chicken curry or etc, and Pickled cucumber, carrot and onions. 

Recipe by Sonia aka Nasi Lemak Lover

Lemon Meringue Pie 柠檬蛋糖派 , CNY bloggers gathering

$
0
0
Today is the last day of February, I have to finished update those foods that I did during CNY. I prepared this Lemon Meringue Pie when a group of bloggers came to my place during CNY time (sorry for this poor photo, I was no time to take proper photo at that time).


The first time I tasted a very yummy lemon meringue tart was at Harrods Café KLCC when I met up with Jessie (Jessie's Cooking moments) and Yen (Eat Your Heard Out) before CNY.

 
Then I made this tart during CNY eve dinner. I was using the leftover pastry from pineapple tart. My family also first time tasted this type of tart, they were impressed too !
This tart is come with difference level of surprise, first you taste the buttery crust and mashmallow texture of meringue, then followed tangy lemon curd, and a hint of chocolate , yummy!


Then when the blogger friends and my best friend came to my house, I again made two large pies to serve them. They also like this pie too. Since I have to prepare many foods on that day, so I prepare the pie first except meringue which only made it on the spot before they come.


Lemon Meringue Pie 柠檬蛋糖派
*makes 2 x 9” round pie pan
 
For the pastry
500g plain flour
300g unsalted butter
1/2tsp fine salt
125g icing sugar, sifted
100g egg (~2 medium eggs)

Method

  1. Mix flour, icing sugar, butter and salt until the flour reaches a sandy texture (I use KA dough hook).
  2. Add in eggs and lightly knead to combine for 1min.
  3. Cover with cling film and refrigerate before use. 

For the filling

  1. Chocolate ganache -110g semi-sweet chocolate ( melt chocolate using double boiler method, add 2tbsp milk)
  2. Lemon curd -one quantity from recipe here
For the Meringue
88g egg white
55g icing sugar, sifted
1/4tsp cream of Tartar
1/2tbsp corn starch

Method

  1. Add in cream of tartar into egg white, beat egg white over high speed for 1min till foamy.
  2. Gradually add in icing sugar and beat till soft peaks.
  3. Add in corn starch and continue beat till stiff peaks.
To make

  1. Roll out pastry onto a lightly floured surface, then line on a loose-bottom round pie pan. Trim and neaten the edges. Prick the base with a fork, line with foil, shiny side down, and chill for 1⁄2-1 hour (or overnight). Bake at a pre-heated oven at 190C for 20-25mins or until golden brown.
  2. Remove pastry case from the pan and cool it, then brush chocolate ganache on the case.
  3. Fill lemon curd in a piping bag, then pipe lemon curd on the pastry case.
  4. Spread meringue on top of lemon curd, then bake at preheated oven at 190C for 10-15mins or until the meringue is slightly coloured. Eat the same day.

Pastry recipe adapted from Academy of Pastry Arts Malaysia, recipe by Sonia aka Nasi Lemak Lover
My blogger friends also brought some very nice foods to my place. Lets see what they have brought:-

Esther - Copycat Kitchen
Crystal - 厨房找快乐
Fion - Aunty Young
Karen - Karen's kitchen
May - 厨苑食谱
Tracy - 平淡的生活


If you want these recipes, you may hop over to Esther's blog to view more details.. Thanks Esther for the detail write up.
 
And below are what I have prepared:-


And this Lemon Meringue Pie


Food bloggers in action ^_^

 
I requested someone to draw horse on popiah (crepe) wrapper since this year is Horse year, see Crystal's drawing, beautiful right?
 
Year of Horse by Crystal..

Beside these gathering, I also met up with Gertrude (My Kitchen Snippets), Elin (Elinluv)  and Cheah (No frills recipe) at Mid Valley KL the other day.
You may go to my Instagram account to view the group photo for these few gathering.
I am so happy to know so many new friends, who said blogging is not good ^_^


Hakka Shui Ban (steamed savoury rice cake) 客家水粄

$
0
0
My mother bought me these old-fashioned bowls, I simply adore to them.  The other day, I use them to make this Hakka Shui Ban a.k.a steamed savoury rice cake, they are perfect to serve this way.


First prepared the filling, which use minced pork and tofu..

 
Then prepare the batter

 
Top the filling on top of rice cake, then enjoy !!


If you wish to try this recipe, advise to increase half amount of the filling, because we feel that we need more filling when enjoy with this plain rice cake..


Hakka Shui Ban (steamed savoury rice cake) 客家水粄
*makes 10 small bowls

For the filling
150g minced pork
90g Hakka yellow tofu, small cubed
4 dried scallops, soak in clean water for several hours, or you may replace with dried cuttlefish
2 garlic, chopped
1/2tbsp oyster sauce
1/2tbsp light soy sauce
1/2tbsp dark soy sauce
Salt to taste
Water from soaked the scallops
Coriander, chopped

Method

  1. Heat 2 tbsp cooking oil in a pre-heated wok, sauté garlic till aroma.
  2. Add in minced pork, tofu, scallops and water, stir to mix well, add in all seasonings, stirring constantly over medium heat until cooked.
  3. Add in chopped coriander, toss until well combined and aromatic, dish out and ready to use.


For the batter
250g rice flour
30g corn flour
1/2tsp salt
1tbsp cooking oil
270ml water
850ml hot boiling water

Method

  1. Combine rice flour, corn flour, salt, cooking oil and water in a mixing bowl. Add in  hot boiling water, keep stirring until well combined, strain well.
  2. Grease the 10 small bowls, and preheat over hot boiling water for 2mins.
  3. Pour batter in steaming bowls until ¾ full. Steam over high heat for 15mins or until cooked. Remove from heat, leave to cool.
  4. Top with filling, and serve.
Recipe reference to cookbook Authentic Chinese dumplings with changes

Canh Kho Qua ( Stuffed Bitter Melon / Bittergourd Soup ) 越式酿苦瓜

$
0
0
Before CNY, my husband shown me a recipe and requested me to cook for him as he missed this stuffed bitter melon which he took good one at Ho Chi Minh Vietnam last time.


I find this way of preparing meat filling with addition of glass noodles is good..


Oh, love this, it was so refreshing and the meat filling tasted not greasy at all. If you love bitter gourd, you have to try this out. Actually it was not bitter at all, but instead 甘 ( bitter aftertaste sweet).
But next time, I must remember to remove the white flesh as much as possible, because it tasted it bit hard..Another important ingredient is the chicken stock, prepare a bit rich of stock.


Canh Kho Qua ( Stuffed Bitter Melon / Bittergourd Soup ) 越式酿苦瓜

15g glass noodles
 5g dried black fungus, soaked and cut into strips
 250g ground pork
 1/2 medium onion, chopped
 1tbsp fish sauce
 1tsp sugar
 1/2tsp salt
 ground white pepper
 1 egg (small)

 2 bitter melons / bittergourds, medium
 6 cups chicken stock
 Chinese chives, blanched in boiling water as this will be used as strings to tie the bitter melons
 coriander leaves (for garnishing)

Method

  1. Soak glass noodles and black fungus separately in water till soften. Roughly cut the glass noodles into 1-1/2-inch pieces and place in a bowl with the pork, black fungus, chopped onions, fish sauce, sugar, salt, pepper and the egg. Mix well and set aside.
  2. Cut a length wise an opening on one side of the bitter melon deep through the seeds but not through the other side. Using a spoon, scoop out the soft white flesh and seeds of the bitter melons.
  3. Fill the whole bitter melon with pork mixture. Tie the both ends of the stuffed bitter melons with the blanched chives.
  4. Put the chicken stock in a large saucepan. Season the soup to taste with a bit of fish sauce and salt and bring to a boil.
  5. Add the stuffed melon to the soup, return to a simmer, and cook for 25 minutes. The bitter melons are cooked when they turn from bright green to olive green.
  6. To serve cut in half or small discs, and garnish with the green onions, coriander and ground pepper.
Recipe adapted from here

Golden Sponge Cake 黄金海绵蛋糕

$
0
0
When my daughter first tasted this sponge cake, she told me this cheesecake is so light and good. But I told her that this is not a cheesecake but just a normal sponge cake. She just couldn't believe it! I am regret that I didn't make this good sponge cake much earlier.


The best thing is you can make this sponge cake anytime you want as the ingredients used are common, butter, flour, eggs, milk and sugar..

 Important tips to get this sponge cake right:-
1. bake it over low temperature first then later increase temperature to medium, and always bake it at the lower rack. So the cake will not shrink at all after it gets cool.
2. Also you need to have stable meringue which requires you to beat till stiff ..Don't worry stiff meringue created dry cake texture, because the batter is using 烫面 "Tang Mein" method (that means cook the egg yolk batter first).


I removed this cake using "bare hands" method. I will try to put up a video on this method soon.

 
This cake is less sweet, so I could enjoyed with some homemade blueberries jam..


Golden Sponge Cake 黄金海绵蛋糕
*makes a 6.3" round cake tin with removable bottom (not a non-stick)

50g butter (salted)
50g cake flour
3 egg yolks
55g milk

3 egg whites
50g caster sugar
6g corn starch

Method
1. Prepare a cake pan, don’t need to line paper.
2. Immediate separate cold eggs from fridge (easy to separate this way) into two mixing bowls. Set aside to return to room temperature.
3. Melt butter in a saucepan, once you see small bubbles, remove from heat.
4. Immediately add in flour, quickly stir to become batter, then add in milk, mix well.
5. Add in egg yolk one at a time, stir well on each addition. The batter is slightly runny if compare to normal chiffon batter.
6. Mix sugar and corn starch together. Beat egg whites till foamy, gradually add in sugar and corn starch mixture (there times) and continue beat until approaching stiff peaks (meringue stand straight up with a little curve at the tip) or till stiff peaks (this stage is a bit difficult to fold with egg yolk mixture)
7. Take 1/3 of meringue and use a hand whisk to mix well with egg yolk batter.
8. Fold in 1/3 of meringue and use a silicone spatula, gently fold with egg yolk batter till slightly combined. Fold in the balance meringue and gently fold till well combined.
9. Pour into cake tin, bake at pre-heated oven at 140C (no fan) for 25mins at low rack, then increase to 170C (no fan) for another 25mins.
10. Once baked, turn your chiffon tin upside down and cool completely before remove from the tin.

Reference : meishilife cookbook, by Sonia aka Nasi Lemak Lover


Pumpkin Custard 金瓜粟米燕菜

$
0
0
In the recent missing MH370 flight, let me realized that we have to 活在當下  (appreciate every moments that we have now !! ). Lets us pray for all the passengers on board this flight and have a safe return..

The other day I got a small good looking pumpkin from wet market, the seller told me this pumpkin is planted here but the species is from Taiwan.


Immediately I thought of a pumpkin custard that I seen in Cass @ 揾到食  blog. Since I have some leftover evaporated milk and a can of sweet corn kernels, so I twist the recipe to make use of these two ingredients. The original recipe is using coconut milk and creamy sweet corns.


Pumpkin Custard 金瓜粟米燕菜
*makes one small pumpkin, and 4 small ramekins

1 small pumpkin ~750g
5g agar-agar powder
100g caster sugar
90g sweet corn kernels (from canned sweet corn)
130g evaporated milk

35g sweet corn kernels

Method

  1. Wash and dry pumpkin. Cut a "lid" in the top, slice off the seedy part, so that you're left with a clean lid or hat. Set aside.
  2. Scoop out the seeds and "guts" of the pumpkin. Save seeds to roast, or discard.
  3. Steam pumpkin over hot boiling water for 30mins. Once done, discard excess water and set aside to cool.
  4. At the same time, blend sweet corn kernels (90g) with evaporated milk till fine.
  5. Add blended corn and milk, sugar and agar-agar powder in a saucepan, cook over medium heat and stir all the time till sugar and agar-agar powder dissolved.
  6. Pour or ladle the custard mixture into the pumpkin (if you have leftover, pour into small containers). Add some sweet corn kernel into mixture. Refrigerate until cool before slice it to serve.
Recipe adapted from Cass blog with some changes


Korean Kimchi 韩国辛奇泡菜

$
0
0
 
The other day, I saw my friend Bakeling made Korean Kimchi, sound easy to make. Since last two days napa cabbage was on sales, i quickly bought one and try this out.


She used chili paste instead the usual way of using chili flakes. She even use local chili paste only. According to her the taste was good. Anyway, I use the Korean chili paste (Gochujang) .
 
 
She also omitted the usual way of adding Cincalok (fermented small shrimps), and I find the Kimchi still taste good and  the taste is quite close if compare to store bought Korean kimchi.
 
I noticed that the kimchi only took 1/2day to fermented, anyway I still kept in room temperature for 1 day then only refrigerated.


I also recorded and weighted all ingredients used, so I can control the consistency of my Kimchi if I going to make again in the future and for your better reference.

Korean Kimchi 韩国辛奇泡菜
*makes one small glass jar
1 medium napa cabbage (~780g)
40g salt (5% over total cabbage weight)
A)
50g radish, shredded
20g carrot, shredded
20g Chives, cut into 2” length
1 spring onion, cut into 2” length
B)
50g apple, cubed
65g pear, cubed
50g yellow onion, cubed
15g garlic
15g ginger
1/4tsp salt
 
C)
60g Korean chili paste (Gochujang)
60g water
1/2tbsp sugar
10g glutinous rice flour 
10ml fish sauce
 
Method
  1. Remove the core from the cabbage and cut it into 1" pieces. In a very large bowl, add the cabbages and toss with the salt. Place a clean plate and heavy object on top.
  2. Put in room temperature for 1 and ½ hour, remove and squeeze the excess water from the cabbage making it crunchier.
  3. At the same time, prepare shredded radish and carrot. Add a pinch of salt, and rest for 30mins, remove and squeeze the excess water.
  4. Cut the chives and spring onion into 2” length, keep aside.
  5. Put all ingredients (B) in a blender and process until fine paste, set aside.
  6. In a saucepan, put all ingredients (C) and stir well. Cook over low heat and stirring all the time till become a paste.
  7. In a large mixing bowl, add cabbage, all other ingredients and fish sauce, mix well. Taste it and add more fish sauce or chili sauce as desired.
  8. Place the kimchi in a glass jar, let it sit at room temperature for 1day for fermentation (you can see the volume is increased as it will generate more liquid). You can now start to enjoy or refrigerate for later use.
Recipe reference: Bakeling, by Sonia aka Nasi Lemak Lover


Puff Pastry with Homemade Blueberries jam 蓝莓果醬酥

$
0
0

I bought a pack of puff pastry few months back, but now I totally forgot what actually I was planning to make at that time. Before the pastry getting expired, I have to quickly use it. First I tried this puff pastry with homemade blueberries jam. And today I use it to make pork and fennel puff rolls (picture posted in my Instagram account).


Making own blueberries jam, it was so fresh and good!


This was my first time using Pampas brand of puff pastry. They come with bigger size, so it is flexible to make into any size. And i found this pastry is less greasy. And I learnt this method of folding pastry from a cookbook that I have.

 
My family appreciate this puff a lot!!


Puff Pastry with Homemade Blueberries jam 蓝莓果醬酥
*makes 9 pastries

To make blueberries jam
150g fresh blueberries
55g caster sugar
3tbsp water
1tbsp lemon juices

Method

  1. Add blueberries, sugar and water in a saucepan. Cook and keep stirring until blueberries is cooked.
  2. Add in lemon juices and stir well. Cook it before store in a glass container.
To shape the puff pastry

  1. Place a 9”x9” puff pastry sheet, on a lightly floured table top.
  2. Use a pizza cutter, equally divide into 9pcs (3”x3”). Carefully fold the pastry in half on the diagonal, creating a triangle.
  3. Use a scissor, cut 1cm from the edge of the both sides of the turnover part but not cut till the end, leave it attached.
  4. Place the pastry on a lined baking tray. Egg wash the whole pastry, then fold one side of the cutting edges through the other and lightly pressed. Repeat another side.
  5. Bake at a pre-heated oven at 180C for 20-25muns or until golden brown.
  6. Cool on a wire rack. Spoon homemade blueberries jam at the centre of the pastry and enjoy!
Shaping method adapted from cookbook meishilife, by Sonia aka Nasi Lemak Lover


Taiping, Perak 2013 (Part 1)_Cuti-Cuti Malaysia 太平自游行

$
0
0

We went to Taiping on last August 2013, can you imagine it took me so long to update this travel post ^_^..Anyway, from now onwards, I will update these travel posts from time to time. This picture was taken at Taping Lake Garden.

First, we stopped by Ipoh for the famous Yong Tau Foo at Pasir Pinji Big Tree Foot (Dai Shu Geok) before heading to Taiping. You can read more review at Motormouth from Ipoh. (one of the blog that featured more on Ipoh foods)


Sar Kok Liew (yambean fritters), one of the must try item. If you want a recipe, you can check my post here.

 
You can order some noodles to go with these Char Liew (fried stuffs) or Yong Tau Foo (vegetable stuffed with fish paste)


 Then we check in at Sentosa Villa , quite a nice place..


 Also went to Taiping Lake garden

 
Dinner taken at the hawker stalls, foods were just ok..


At night, we went to Taiping Night Safari


Kids were having fun there, but I told them that I didn't see many animals as inside was so dark, LOL!
 
The next morning, we went to this shop to take Kuoy Teow soup (flat rice noodles) , taste were just ok..

 
Restaurant Kakak Kuoy Teow soup

 
We also went to Perak Muzuem

 
I saw these nice old-fashioned plates with black flower printing, so special..


Opposite of this musuem is Taiping Jail

 Before heading to Kuala Sepetang- Matang Mangrove Forest, we also stopped by a charcoal factory.
 
 
But we didn't get inside because it was too smoky..


This place is so nice and calm, remind me of the Bamboo forest at Kyoto 


when my son Desmond was upset ^_^ (forgot what reason he was upset at that time)

 wild lizard

 
baby mud crabs..
 

We took lunch at a Seafood restaurant Kang Kao十八丁港口海鲜楼


Every seafood that we ordered were so fresh and good!


Nice view while enjoying our lunch..


sun bath the salted fishes..

Foochow Red Rice Wine Mee Sua Soup 福州红糟酒面线

$
0
0
Special Thanks to my blogger friend May who brought me this Foochow red rice wine and Mee Sua (thin and salted rice noodles), so we have a chance to try this authentic Foochow Ang Jiu Mee Sua at home. Foochow peoples especially like to cook this Ang Jiu Mee Sua during confinement time (after delivered baby) . And every Foochow grandmother also know how to make this red rice wine at home.


 The Foochow red rice wine was homemade by May's mother and Mee Sua was bought from May's hometown Sitiawan ( a place mostly Foochow peoples) .


 When I was cooking this soup, the nice ginger and sesame aroma remind me of my confinement time !!


Oh, this was delicious ~ even my kids also enjoyed it!


Foochow Red rice wine Mee Sua Soup福州红糟酒面线
*serve 5
800g chicken, cut into bite-size
4tbsp sesame oil
3tbsp Foochow rice wine 红糟酒
1tbsp ginger shredded
 
300ml Foochow rice wine 红糟酒 or adjust according to your preference
1lt water
1tsp salt
1tsp chicken stock powder
 
Mee Sua (thin and salted rice noodles)
Chopped corianders
Method
  1. Heat sesame oil in a pot, sauté ginger till aroma.
  2. Add in chicken pieces and 3tbsp Foochow rice wine, stir fry till color changed and aroma.
  3. Add in Foochow rice wine and water, bring to boil. Reduce heat to medium, continue to cook for about 30mins. Add in the seasoning, do not over season with salt as Mee Sua also tasted salty.
  4. To serve by individual serving, cook Mee Sua in hot boiling water for less than 1min then put into a serving bowl. Pour the cooked Foochow red wine chicken soup into the serving bowl. Sprinkle some chopped coriander, serve hot.
Reference: 厨苑食谱 and life sinchew, by Sonia aka Nasi Lemak Lover


Micro butter buns (Wei Bo buns) 微波面包

$
0
0
This is a popular bread recipe especially among Chinese bloggers since last year. It was first published by Siew Hwei .I am not really sure why this bread in Chinese called 微波 (microwave), I guess due to this bread roll into layer and layer, look like wave. Initially, I was not sure how to name this bread in English. After tasted it, then I decided to name this bread as butter buns, because this bread recipe use more butter than normal bread recipe, and it taste a bit buttery. Anyway, this bun is soft and nice even kept for two days, definitely a keeper. ( as updated by reader Lynn, this bun called as Micro buns)


This Wei Bo bread have to prepare sponge dough first, but don't need to wait for overnight. After first prove, then can be used to add with other ingredients then do 2nd prove.

 
I have altered the original recipe:-
1. Replace milk powder with milk - I can't find milk powder in my pantry anymore since I have no baby drinking milk ^_^.
2. Replace brown sugar with white sugar- because I can't find in my pantry.
3. Reduce instant yeast amount
4. Reduce butter amount


I also cut short the steps by omit the resting time.
Once the 2nd dough was ready (after knead and no rest), I straight away started to roll into small ball then roll up like swiss roll. Once finished, I didn't rest the dough, straight away roll up 2nd time.


This was 2nd time roll up. Once done, place this cute little swiss roll dough on a baking tray to prove.

 
I really like to see them after roll up, look so cute ..


Micro butter buns (Wei Bo buns) 微波面包
*makes 24buns

A)
400g High protein flour or bread flour
6g instant yeast (1 and 1/2tsp )
115g eggs ( 2 A size eggs)
120g milk

B)
130g High protein flour or bread flour
80g sugar
1/4tsp fine salt
50g water
60g butter, room temperature 

Egg wash-1 egg + 1tbsp milk 

Method:

  1. Mix all ingredients (A) in a mixing bowl and knead to form a dough.
  2. Cover with cling wrap or cloth, and leave to prove until double size.
  3. Add in ingredients (B) in a mixing bowl, tear dough (A) into small pieces and add into mixing bowl. Knead to form a smooth dough.
  4. Add in butter continue to knead till dough is smooth and elastic.
  5. Divide the dough into 40g each, roll into ball, repeat the rest till finished.
  6. Take a ball (start from the first ball), roll out into long rectangle shape, then roll in tightly like a swiss roll, keep aside to rest, repeat the rest till finished.
  7. Take a swiss roll dough (start from the first swiss roll dough), roll out into long rectangle shape, then roll in tightly like a swiss roll.
  8. Arrange the dough into a baking tray, leave to prove for 50mins.
  9. Brush with egg wash, bake at a pre-heated oven at 170C for 15-20mins or until golden brown.
Recipe adapted from Siew Hwei with minor changes, by Sonia aka Nasi Lemak Lover


Easy Strawberry Mille-feuille a.k.a Napoleon 拿破仑千层草莓酥

$
0
0
We just came back from a short trip to Cameron Highlands. I bought some very fresh and large strawberries. I immediate thought of this French pastry Mille-feuille or Napoleon which made up using three layers of puff pastry, and alternating with two layers of pastry cream. I made an easy version, using store-bought puff pastry sheet, sandwich with whipping cream that flavoured with strawberry flavours and fresh strawberry from Cameron highlands.


This pastry not only easy to make, but it tasted great! Crispy, buttery and saltiness of puff pastry, yummy strawberry whipped cream (feel like eating strawberry ice-cream) and sweet fresh strawberry, yummy!


Easy Strawberry Mille-feuille a.k.a Napoleon 拿破仑千层草莓酥
*makes 2  

1 sheet of puff pastry (8”x8”), thawed
200g whipping cream (dairy)
30g caster sugar
1/2tsp strawberry flavoured powder, optional
Fresh strawberry
Powdered sugar, for dusting

Method
  1. Line a baking tray with parchment paper and preheat the oven to 180C.
  2. Place puff pastry sheet on the baking tray, using a fork, prick holes over the whole pastry to prevent it from puffing up while baking. Slice pastry sheet to half. Bake for 25mins or until golden brown. Remove from oven, wait till slightly cool, slice each sheet into 3 small rectangular.
  3. Add sugar and whipping cream in a mixing bowl, place this mixing bowl over a large mixing bowl that filled with ice water. Beat over high speed till soft peak. Add in strawberry powder, continue to beat till stiff peak.
  4. To decorate, place one baked puff pastry on a serving plate, pipe cream on top and place some strawberry. Place second piece of baked puff pastry, pipe cream and place some strawberry. Then place third piece of baked puff pastry, dust with some powdered sugar then serve.
Recipe by Sonia aka Nasi Lemak Lover


Thit Kho (Vietnamese Caramelized Braised Pork and Eggs) 越式卤肉

$
0
0

Vietnamese braised pork is slightly difference from the usual Chinese braised pork. The nice golden and brown colour is not provided from the usual soy sauce but caramel sauce (Nuoc mau). There is no soy sauce is added in this recipe but still given nice colour. Anyway, I didn't prepare Nuoc mau ahead, instead I followed the way that my mother taught me when braise pork, also similar like Nuoc mau, cook sugar and oil till caramelized.


Another interesting ingredient in this recipe is using coconut juices (not coconut milk) to replace water. But frankly we couldn't detect any coconut smell from this dish. 


Anyway the gravy was deeply rich in flavour even though the taste was slightly in sweet side (even i have reduced sugar)..


Thit Kho (Vietnamese Caramelized Braised Pork Belly and Eggs) 越式卤肉

500g pork belly, cut into 2-3” pieces
4 hard-boiled eggs
1 tofu, slice into 4

2 cloves garlic, sliced
2 shallots, sliced
1/2tsp green peppercorns

2tbsp cooking oil
1tbsp brown sugar or to taste
1tbsp fish sauce or to taste
1tsp salt or to taste
1/4tsp Five-spice powder
1 cup fresh coconut juices 

Method

  1. Using a pestle and mortar, pound garlic, shallots and peppercorns till fine paste.
  2. Heat cooking oil in a pot over medium low heat, add the brown sugar and stir until it melts. Cook the sugar until it turns caramel and deep golden brown.
  3. Add in the pork and cook for 3-5 minutes on medium-high heat until the meat is evenly coated with the caramel, but not cooked through. Add in garlic shallot paste, mix to combine.
  4. Add in coconut juices and eggs, the liquid should be generous enough to cover both the pork and eggs to caramelize evenly, if not, add a bit more water or additional coconut water if you still have some left. Add in fish sauce, salt and five-spice powder.
  5. Turn to medium high heat and bring to rolling simmer and cover lid, reducing heat to low. Braise for at least 1 hr (add in tofu after 30mins). The natural sugars of the coconut juice and fish sauce will caramelize the pork and eggs. Taste sauce and adjust with additional fish sauce or sugar to taste.

Recipe reference: here, by Sonia aka Nasi Lemak Lover

Orange Chiffon Cake 香橙戚风蛋糕

$
0
0
I have quite a while did not bake an orange chiffon cake. Since I have some oranges that bought from Cameron highlands trip the other day, quickly use it to make this " no artificial substances" chiffon cake.


Never know that Cameron highlands here also can harvest so nice orange, it is quite similar like bloody orange. The flesh is a bit red in colour. This orange from Cameron is sweet, tasted like grapefruit but no bitter taste like grapefruit.

 
Nowadays I try to make chiffon without adding any chemical substances like cream of tartar, so pure and natural chiffon..


Orange Chiffon Cake 香橙戚风蛋糕
      *makes a 7” tube chiffon pan 
3 egg yolks (A size)
15g caster sugar
70g cake flour
45g orange juices
40g corn oil
1/2tsp orange rind, optional 

3 egg white (A size)
45g caster sugar
1/2tsp lemon juices 
Method
  1. Immediately separate cold eggs after taken them out from the refrigerator (cold eggs separate more easily) into two mixing bowls (No oil and no water in these bowls, clean and dry bowls). Set aside and allow them return to room temperature.
  2. Add in sugar into egg yolks, immediately lightly whisk the egg yolks and sugar till light (Try to whisk immediately once sugar is added into egg yolks, egg will cover the sugar and turned hard if sit there for too long).
  3. Add in corn oil, mix well. Then add in orange juices and orange rind, stir well to combine. Add in flour, stir to well combine.
  4. Beat egg whites and lemon juices till foamy , gradually add in sugar in there batches and continue beat until soft peak formed (takes about 4-5mins using speed 3 at a hand mixer)
  5. Take 1/3 of meringue and use a hand whisk to mix well and lighten the egg yolk batter (Do not worry you will deflate the batter at this stage )
  6. Now change hand whisk to a silicone spatula, fold in 1/3 of meringue, gently fold with egg yolk batter till slightly combined. Fold in the balance meringue and gently fold till well combined.
  7. Pour cake batter into chiffon pan, wipe off those excess batter stick on the tube or insert area. Fill batter about 80% full but not fill too full as cake has no space to rise while baking and resulted cake shrinkage. Tap pan on the counter top to remove air trapped inside the batter.
  8. Bake at pre-heated oven at 170c for 35mins-40mins at middle rack or until cooked.
  9. Once baked, turn your chiffon tin upside down and cool completely before remove from the tin.
  10. Chiffon cake is ready to unmould. You can use a plastic thin spatula to run the pan and unmould the chiffon or you can unmould using bare hands method if you have master this skill.
Recipe by Sonia aka Nasi Lemak Lover


I'm sharing this post with Little Thumbs Up April 2014 Event - Orange organised by Bake For Happy Kids and My Little Favourite DIY hosted by Anncoo Journal
Little Thumbs Up

Sweet and Sour Pork Ribs 紅燒排骨

$
0
0
 
Recently I just upgraded the private TV channels (Astro) to include few new channels. And i found one interesting channel mainly use Hokkien dialect (HHD). I am not interest on those drama but I love to watch their food show that more sharing on Hokkien cuisines. I learnt this sweet and sour pork ribs from a show that shared by a owner of a restaurant mainly serve Foochow cuisines. I know how to cook sweet and sour pork, but this recipe I tried has very nice and crispy deep fried pork ribs. Even the dish has cooled down, the deep fried pork ribs still taste a bit crispy.


This time I use a new part of pork, called bone-in pork belly ( butcher told me it called Chiak Hou Kuat) . The usual pork belly normally is boneless, but this bone-in pork belly is pork belly with the ribs intact. I found so interesting when I find this new part of pork from the butcher. And you have to make booking for this part as usually butcher will separate out pork belly and pork ribs and sell them separately.


What made it so crispy? Coat the pork ribs with two type of flour, first with tapioca flour or starch then with potato starch. Just thinly coat them will do.


According to this Foochow chef, usually Foochow people like to add fish sauce in their cooking, no salt is added. Anyway, I still added a bit of salt to have more flavour.


Sweet and Sour Pork Ribs 紅燒排骨 
600g pork spare ribs ( I use bone-in pork belly ), chopped into bite-size pieces
1/4tsp Chinese five spices powder
1/4tsp fish sauce
2tbsp tapioca starch
1 1/2tbsp potato starch 
1tbsp chopped garlic
2 small chili, sliced
1 small onion, wedges
1 small tomato, wedges
2 small green and yellow pepper (capsicum), wedges
1 spring onion, sliced
 
Seasonings (combine together in a mixing bowl to become sauce)
3tbsp tomato ketchup
1tbsp chili sauce
1tbsp sugar
1/2tsp salt
1tsp fish sauce
1/4tsp tapioca starch
3tbsp water
1/2tsp dark soy sauce 
 
Method
  1. Marinate pork ribs with Chinese five spices powder and fish sauce for several hours.
  2. Coat pork ribs with tapioca starch then coat with potato starch.
  3. Heat enough cooking oil in a wok and deep-fry marinated pork ribs over high heat (due to the flour coating, the pork ribs will not brown so quickly even deep fry over high heat) until golden brown. Dish out and drained.
  4. In a clean wok, add 2tbsp of deep fry oil and sauté garlic until fragrant. Add in small chili, onion, tomato, and green and yellow capsicum, sauté for 1min.
  5. Pour in combined source, then followed by deep fried pork ribs. Quickly toss well to combine. Dish out and serve hot.
       Recipe by Sonia aka Nasi Lemak Lover


Chocolate Mousse Cake 巧克力慕思蛋糕

$
0
0
I have quite long did not make a Birthday cake,. Sometime I just feel lazy to make one ^_^. Like my Birthday, I just bought one from outside. I made this cake for my son Lucas' Birthday, also last minute decided to make this simple chocolate mousse cake. I did not frost the whole cake, sometime I feel naked cake look pure and sexy, an excuse for a lazy mom like me,LOL.


Chocolate Mousse Cake 巧克力慕思蛋糕

To make chocolate sponge cake (refer to step by step recipe here)
*for a 6.5” round removable bottom pan (not a non-stick) 

3 egg yolks (A size)
15g caster sugar
35g corn oil
45g milk
15g cocoa powder
1/4tsp chocolate emulco,optional
50g cake flour 

3 egg whites (A size)
1/8tsp cream of Tartar
45g caster sugar 

Method
  1. Lightly whisk egg yolk with sugar.
  2. Add in corn oil, stir to combine.
  3. Add in milk, stir to combine, then add in cocoa powder & chocolate emulco, mix well.
  4. Add in cake flour, mix well, set aside.
  5. Add cream of tartar into egg white, beat till foamy.
  6. Gradually add in sugar, beat till stiff peaks (十分发 / 硬性发泡) or close to stiff.
  7. Take 1/3 portion of egg white mixture and use hand whisk to mix with egg yolk mixture till light.
  8. Fold the balance of egg white mixture into egg yolk mixture using a spatula, combine well.
  9. Pour batter into the pan (do not need to line with baking paper and do not use a non-stick pan).
  10. Bake at pre-heated oven at 140c for 25mins (at lower rack), then increase to 170C and continue to bake for 25mins. Remove cake from oven and cool on a wire rack (prefer to invert the cake pan).
  11. Once cake is slightly cool down(10-15mins), remove cake from cake tin (use a think and flat spatula to run around the side and bottom of the cake pan) and let it cool completely on a wire rack.

To make chocolate mousse

50g UHT whipping cream

50g milk
1 egg yolk (A size), lightly stir well
150g chocolate
150g UHT whipping cream 

Method

  1. Beat 150g whipping cream till stiff (over a bowl of iced water), keep in the fridge before use.
  2. Mix whipping cream and milk in a saucepan, cook it till hot.
  3. Remove saucepan and wait slightly warm, add in egg yolk, stir to mix well.
  4. Return saucepan to heat, stir to mix well.
  5. Melt chocolate over simmering water till melted. Add chocolate into milk mixture, cook over low heat till thicken.
  6. Wait till chocolate mixture cool down, mix in the whipped cream, stir to combine.
To assemble chocolate mousse cake – slice sponge cake into 3 pcs, equally divide chocolate mousse into 3 portions. Using a cake ring or removable bottom cake pan, place one piece of sponge cake then pour in chocolate mousse, repeat the rest till finished. Refrigerate for 4hrs or preferable overnight. Decorate the cake as per desired. Use a hot towel (or a hairdryer), wrap the cake pan, then remove the cake.

Chocolate mousse recipe adapted from Eileen, with minor changes, recipe by Sonia aka Nasi Lemak Lover


This cake has rich chocolate taste, as for the mousse, like eating chocolate ice-cream, yum! For the chocolate, I used 3 difference type (from the leftover), chocolate bar (Meiji brand, dark chocolate and milk chocolate), and Hershey's semi-sweet chocolate chips..

Curry Puff 咖哩角

$
0
0


If compare to earlier spiral curry puff, this simple method of curry puff not tasted flaky but it still tasted crunchy after cool down. Anyway, this curry puff is much easy to make if compare to spiral type.


I saw my friend Helena shared this simple curry puff a year ago, till now only got a chance to try it out. I also planning to bring this curry puff to a bloggers party (will update more later )

You can made in large batch, frozen it and deep fry whenever you crave for some.


My little son helped me to capture on how to make the pleat of this curry puff, refer video below.


Curry Puff 咖哩角
*makes 30pcs 

Pastry
185g all-purpose flour
35g rice flour
35g corn flour or tapioca flour
35g butter (salted)
35g cooking oil or vegetable oil
90g icy cold water

Filling
450g potato, peeled and diced
1 medium onion, diced
200g chicken breast (cut into small pieces), marinate with 1/2tbsp curry powder
1tbsp curry powder
1/2tbsp chili powder
3tbsp vegetable oil
3 sprigs curry leaves
1 cup water (+/-)
1tsp salt
1tsp chicken powder
1tsp fish sauce

Method
To cook filling
1. Marinated chicken breast with 1 tbs curry powder for 1hour. Heat oil in wok, add in curry leaves and onion. Saute onion until translucent then add in potato.
2. Cook until potato has changed colour on the edges then add chicken breast, stir fry for 1-2mins then add in curry powder and chilli powder. Add water and bring to boil.
3. Add salt, sugar, chicken powder & fish sauce to taste, then turn the heat down and cook with until potato is soften and the liquid has reduced and form a dry paste. Cool completely before use. 

Pastry
1. In a large mixing bowl, bring 3 types of flours together and mix well. Set aside.
2. Rub in butter with flours until crumble, then add in cooking oil, to mix well.
3. Pour icy cold water over flours, mix thoroughly with a wooden spatula in the mixing bowl. Then, lightly knead till soft dough, do not over work. Cover dough with plastic wrap and rest for at least 15 minutes. 

To assemble- Divide and shape dough into 13g each ball. Then roll out each ball into a 8-10cm circle, wrap in potato filling. Pinch edges to seal, then deep-fry in medium hot oil until golden brown.

You may refer to this video on how to pleat the edges.

Recipe source: Helena Kitchen with minor changes, by Sonia aka Nasi Lemak Lover

Kuih Bahulu / Ji Dan Gao 烘鸡蛋糕

$
0
0
Earlier I made the old-fashioned of kuih Bahulu ( egg sponge cake) by adding Soda drink method. This time I tried with difference method, adding some raising agent (use self-raising flour) and add more sugar. As I know more sugar resulted more crispy and hard crust of kuih bahulu. Even I have increased sugar, but the sweetness still acceptable, perfect to enjoy over a cup of black coffee.


When I make this batch, the homemade pandan paste is not ready, so the green color wasn't evidence. I made second batch again today (no time to take new photo), it has nicer natural green color.

 
How to know the egg mixture is ready? When you add flour into it, and it didn't sink and stay on top, that means the egg mixture is very stable. After you added the flour, the volume will be reduced, it is normal, don't worry, but not to over mix it.

 
I fill the mould with 100% full of batter, as I like to see these nice bump and round shape of kuih bahulu.

 
When these kuih bahulu just hot came out from the overn, it was so crispy and full of egg nice aroma!! If compare to earlier version, the crispiness and hard crust of this kuih bahulu can last longer (make sure store in air-tight container). So this is perfect for me to bring to an International bloggers event (will update more later).

I still prefer to use cold-egg beating method, like earlier orange sponge cupcakes. I got the idea of mixing two type of flours after saw my friend Jane's post.

Kuih Bahulu / Ji Dan Gao 烘鸡蛋糕  

3 eggs (A size) , 56g-57g per egg
120g caster sugar
35g cake flour
70g self-raising flour
1tsp homemadepandan paste, optional
Corn oil, for greasing 

Method

  1. Pre-heat oven to 200C, grease the Bahulu mould with oil, pre-heat for 5mins.
  2. Sift cake flour and self-raising flour together, set aside.
  3. Remove eggs from the fridge, add into the mixing bowl, add in caster sugar, immediately beat it till pale, thick and fluffy (I use hand electric mixer, 4mins at high speed 4, 11mins at speed 2, 1min at speed 1, total time 13mins ).
  4. At the slowest speed, add in flour in 3 batches, add in pandan paste ,roughly combine. Then gently fold with a spatula till well combined.
  5. Remove Bahulu mould from the oven, spoon mixture into mould and fill 100% full (so you can have nice bump on top).
  6. Bake for 12mins (no fan) at middle rack or until golden brown.
  7. Remove mould from oven and put on wire rack, use a toothpick or bamboo skewer, prick cake with skewer and lift out. Cool on wire rack or bamboo basket. Store in air-tight container once cooled.
  8. Grease warm mould again before use and put into oven to re-heat for 5mins. Continue to bake until all mixture finished.
  9. Store cool kuih Bahulu in air-tight container, consume within 2 days, otherwise store in the fridge for later consume.
Recipe by Sonia aka Nasi Lemak Lover


Eiffel Tower, Salon Du Blog Culinaire , Paris Apr 2014 巴黎自由行

$
0
0

Bonjour everyone!! I just returned from a free and easy to Paris and London. This was my second time to Paris after 8 years ago. This time, I brought my family and mother along. At the same time, my Paris blogger friend Nadji @ Saveurs et Gourmandises  (Flavours and Delicacies) took this opportunity to invite me to join a Paris bloggers culinary event (Salon Du Blog Culinaire) which coincidently held on our first day of arrival to Paris.


Eiffel Tower, a place must visit when you visit to Paris. First we went there during evening time after sunset.  We saw her in pink (not long after sunset, photo posted in Instagram), then waited until it light up, it was beautiful..


Then we went again during a hot sunny day to have difference view of Eiffel tower. She has difference beauty in difference time of viewing. After exit from Metro station, we tried walk to Palais de Chaillot Trocadero which believe from here you can have best view of Eiffel tower.


Look at the sky, so blue ...


I took this photo at the middle of road when we crossing the road, it was quite dangerous !!


My husband and I sat down here while waiting for our kids and mother as they went up to the top of Eiffel tower (we have went to the top in earlier trip). They have to waited very long to went up to the top, about 2-3hrs waiting time, too many tourists in Paris nowadays!! We were waited till sunset but we have to run to a covered bus stop to wait as the weather was chilled and very cold. Also partly due to the disturbance of peoples who keep approaching us asking to buy liquor and cigarette or asking money for signing survey. Personally i prefer to look Eiffle tower from far, but not near to her !!

Salon Du Blog Culinaire (Paris bloggers culinary event)
- This was my first time attended a blog event in oversea. Thanks to Nadji for extend the invitation to me, so we (my family also got invited ) could tasted out many French delicacies, a lot of foods are new to us!!


We can tasted out everything in this event included this large and juicy fresh strawberries.

 
Kenwood mixer demo

 
wine tasting

 
macarons

 
salad mixing

 
we were impressed with this white asparagus salad, the asparagus was crunchy when it is raw.


Not sure what insect was this, but my first time tasted insects, LOL !

 
There was a session where all bloggers bring their own foods to share, these were some of the foods that they brought. I also brought Malaysia's local delicacies, kuih bahulu and curry puff. But I totally forgot to take a picture of it. We also has no time to taste out all these yummy foods prepared by Paris bloggers as we have to continue to explore Paris.


Nice meeting to my Paris blogger friend Nadji (second from left and she was so happy to receive a wooden mooncake mould from me  ) and few other new blogger friends..( now I would say Food blogging has no boundary !!)


Viewing all 566 articles
Browse latest View live